Node.js is a popular JavaScript runtime environment that allows developers to build high-performance, scalable, and event-driven applications. One of the most common use cases for Node.js is building APIs (Application Programming Interfaces) that can be used to interact with various systems, databases, or other applications. In this essay, we will explore the steps involved in creating a Node.js API.
Step 1: Setting up the development environment Before we can start building a Node.js API, we need to set up our development environment. This involves installing Node.js and a code editor such as Visual Studio Code. Once installed, we can open a new project folder in our editor and initialize a new Node.js project using the command npm init. This will create a package.json file that lists the dependencies and configurations for our project.
Step 2: Installing required packages Next, we need to install the packages required for building our API. The most common packages used for building Node.js APIs are Express and Mongoose. Express is a minimalistic web framework that provides a simple and intuitive way to handle HTTP requests and responses. Mongoose is an Object-Document Mapping (ODM) library that provides a way to interact with MongoDB databases. We can install these packages using the command npm install express mongoose.
Step 3: Creating the server Now that we have installed the required packages, we can start building our API. The first step is to create a server that will listen for incoming requests. We can create a new file called server.js and add the following code:
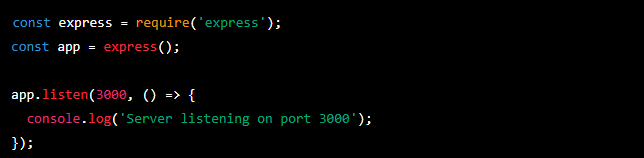
This code creates a new instance of the Express application and starts a server that listens on port 3000.
Step 4: Defining routes The next step is to define the routes that our API will handle. Routes are the endpoints that clients will use to interact with our API. We can define a new route for handling GET requests to the root of our API by adding the following code:

This code creates a new route that handles GET requests to the root of our API and responds with the message “Hello World!”.
Step 5: Connecting to the database If our API needs to interact with a database, we need to connect to it. We can use Mongoose to connect to a MongoDB database by adding the following code to our server.js file:
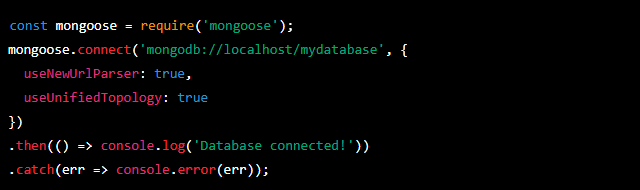
This code connects to a local MongoDB database called “mydatabase” using the default connection settings.
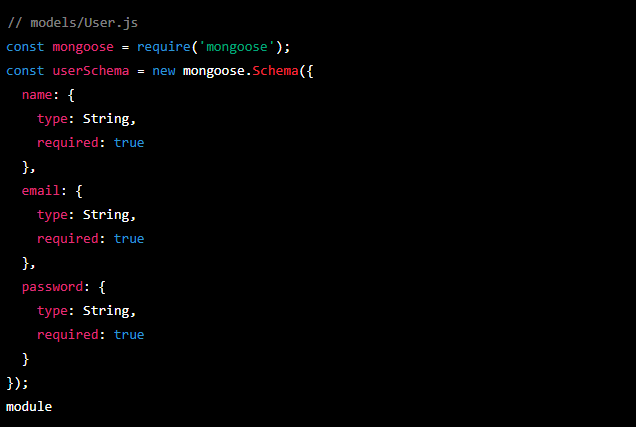
Step 6: Creating models and controllers Now that we have set up our server, defined our routes, and connected to our database, we can start building the models and controllers that will handle our API requests. Models define the data structure of our objects, while controllers handle the logic for interacting with our database. We can create a new model and controller for handling CRUD (Create, Read, Update, Delete) operations on a “users” collection in our database by adding the following code:
Contact us at:
p: 1300 088 712
e:info@challengerx.com.au
You probably found us with: web & database designers, web and database designers, sharepoint design melbourne, sharepoint designer melbourne